
Notice
Recent Posts
Recent Comments
Link
| 일 | 월 | 화 | 수 | 목 | 금 | 토 |
|---|---|---|---|---|---|---|
| 1 | 2 | 3 | ||||
| 4 | 5 | 6 | 7 | 8 | 9 | 10 |
| 11 | 12 | 13 | 14 | 15 | 16 | 17 |
| 18 | 19 | 20 | 21 | 22 | 23 | 24 |
| 25 | 26 | 27 | 28 | 29 | 30 | 31 |
Tags
- delete
- Controller
- log4jdbc
- mybatis
- log4j
- update
- Connection pool
- MVC CRUD
- jdbc
- CRUD
- 게시판만들기
- spring
- Oracle
- hikaricp
- MVC설정
- MVC 게시판
- service
- 환경설정
- MVC
- 게시판
- Oracle 연결
- 서비스계층
- 게시판 List
Archives
- Today
- Total
yahayaha
32. 첨부파일 조회 본문
게시물을 조회할 때 첨부파일을 Ajax로 처리하기로 했으면 우선 서버측에서 JSON 데이터를 만들어서 화면에 올바르게 전송해야함.
이미 findByBno() 메서드가 완성되어있는 상태여서 sevice와 seviceImpl의 클래스를 수정해야함.
public List<BoardAttachVO> getAttachList(Long bno);

@Override
public List<BoardAttachVO> getAttachList(Long bno) {

    log.info("GET ATTACH list by bno : " + bno);
    return attachMapper.findByBno(bno);
}
이제 Controller는 특정한 게시물 번호를 이용해서 첨부파일과 관련 데이터를 JOSN으로 반환하도록 처리
@GetMapping(value = "/getAttachList", produces = MediaType.APPLICATION_JSON_VALUE)
@ResponseBody
public ResponseEntity<List<BoardAttachVO>> getAttachList(Long bno){
    log.info("getAttachList : " + bno);

    return new ResponseEntity<>(service.getAttachList(bno),HttpStatus.OK);
}
@RestController로 작성이 안되어서 직접 @ResponseBody를 적용해서 JSON 데이터를 반환.
이제 get.jsp에서 게시물의 첨부파일을 가져오는 부분이 자동으로 동작하게 처리.
<script>
$(document).ready(function(){
(function(){
var bno = '<c:out value="${board.bno}"/>';
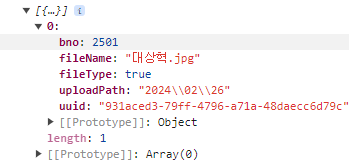
$.getJSON("/board/getAttachList", {bno: bno}, function(arr){
console.log(arr);
}); //end getjson
})(); //end function
});
</script>
$(document).ready(function()를 이용해서 첨부파일 데이터를 가져오는 부분의 즉시 실행 함수를 이용해서 처리.

데이터가 제대로 가져와져있으니 파일을 보여주는 영역을 생성해야함.
<!-- 파일 업로드 부분 -->
<style>
.uploadResult{
    width:100%;
    background: gray;
}
.uploadResult ul{
    display: flex;
    flex-flow: row;
    justify-content: center;
    align-items: center;
}
.uploadResult ul li{
    list-style: none;
    padding: 10px;
}
.uploadResult ul li img{
	width: 300px;
}
.uploadResult ul li img span{
	color:white;
}
.bigPictureWrapper{
    position: absolute;
    display: none;
    justify-content: center;
    align-items: center;
    top: 0%;
    width: 100%;
    height: 100%;
    background-color: gray;
    z-index: 100;
    background: rgba(255,255,255,0.5);
}
.bigPicture{
    position: relative;
    display: flex;
    justify-content: center;
    align-items: center;
}
.bigPicture img{
	width: 300px;
}
</style>


<div class="form-group">
   <label>Writer</label>
   <input class="form-control" name="writer" value='<c:out value="${board.writer}"/>'>
</div>

<div class="row">
  <div class="col-lg-12">
    <div class="panel-geading">Files</div>
    <div class="panel-body">
        <div class="uploadResult">
            <ul>
            </ul>
        </div>
    </div>
  </div>
</div>
이제 본격적으로 JSON으로 가져온 첨부파일 데이터를 작성된 DIV 안에서 보이도록 처리해줘야함.
전달된 JSON 데이터는 BoardAttachVO 객체.
Javascript도 수정이 필요함.
$(document).ready(function(){
    (function(){
        var bno = '<c:out value="${board.bno}"/>';
        $.getJSON("/board/getAttachList", {bno: bno}, function(arr){
            console.log(arr);

            var str = "";

            $(arr).each(function(i, attach){
                // img type
                if(attach.fileType){
                    var fileCallPath = encodeURIComponent(attach.uploadPath+"/s_"+attach.uuid+"_"+attach.fileName);

                    str += "<li data-path='"+attach.uploadPath+"' data-uuid='"+attach.uuid+"' data-filename='"+attach.fileName+"' data-type='"+attach.fileType+"'><div>";
                    str += "<img src='/display?fileName="+fileCallPath+"'>";
                    str += "</div></li>";  // 수정된 부분
                } else {
                    str += "<li data-path='"+attach.uploadPath+"' data-uuid='"+attach.uuid+"' data-filename='"+attach.fileName+"' data-type='"+attach.fileType+"'><div>";
                    str += "<span> "+ attach.fileName+"</span><br/>";
                    str += "<img src='/resources/img/attach.png'>";
                    str += "</div></li>";  // 수정된 부분
                }
            });
            $(".uploadResult ul").html(str);
        }); //end getjson
    })(); //end function
});
그리고 브라우저에서 확인.
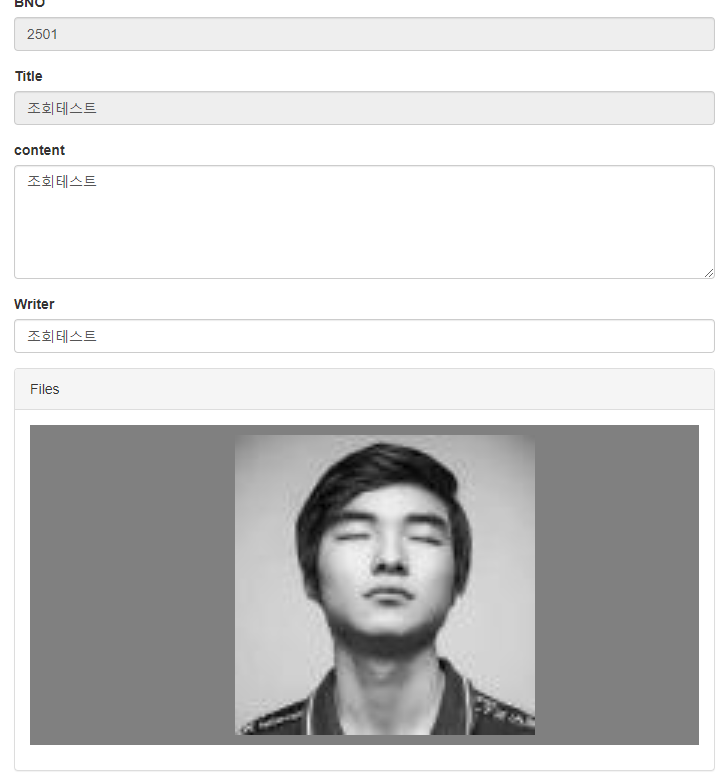
이제 첨부파일 목록이 제대로 출력이 된다면 이미지 파일 경우 화면에서 원본 이미지, 일반 파일은 다운로드 처리가 필요함.
$(".uploadResult").on("click", "li", function(e){
    var liObj = $(this);
    var path = encodeURIComponent(liObj.data("path")+"/"+liObj.data("uuid")+"_"+liObj.data("filename"));

    if(liObj.data("type")){
        showImage(path.replace(new RegExp(/\\/g),"/"));
    } else {
        // 다운로드
        self.location = "/download?fileName=" + path;
    }
});

function showImage(fileCallPath){
    alert(fileCallPath);
    $(".bigPictureWrapper").css("display", "flex").show();
    $(".bigPicture")
    .html("<img src='/display?fileName="+ fileCallPath + "'>")
    .animate({width:'100%', height: '100%'}, 1000);

}

$(".bigPictureWrapper").on("click", function(e){
    $(".bigPicture").animate({width:'0%', height: '0%'}, 500);
    setTimeout(() => {
        $(this).hide();
        }, 500);
});
이렇게 일반파일 다운로드와 원본이미지 파일 크게 보는 스크립트처리까지 완료
'spring > 프로젝트' 카테고리의 다른 글
| 31. 첨부파일 등록하기 (0) | 2024.02.24 |
|---|---|
| 30. 첨부파일 삭제 (0) | 2024.02.21 |
| 29. 파일 다운로드( 다운로드 UUID 지우기, 이미지 원본 javascript 처리 ) (0) | 2024.02.21 |
| 28. 파일 다운로드(브라우저 처리) (0) | 2024.02.19 |
| 27-2. 파일 업로드(썸네일 이미지) (2) | 2024.02.18 |
'spring/프로젝트' Related Articles
more


