
| 일 | 월 | 화 | 수 | 목 | 금 | 토 |
|---|---|---|---|---|---|---|
| 1 | 2 | |||||
| 3 | 4 | 5 | 6 | 7 | 8 | 9 |
| 10 | 11 | 12 | 13 | 14 | 15 | 16 |
| 17 | 18 | 19 | 20 | 21 | 22 | 23 |
| 24 | 25 | 26 | 27 | 28 | 29 | 30 |
| 31 |
- mybatis
- jdbc
- hikaricp
- MVC설정
- 게시판
- 게시판만들기
- delete
- update
- Connection pool
- 게시판 List
- MVC 게시판
- log4j
- spring
- 환경설정
- Controller
- log4jdbc
- Oracle 연결
- service
- Oracle
- MVC CRUD
- MVC
- CRUD
- 서비스계층
- Today
- Total
yahayaha
27-2. 파일 업로드(썸네일 이미지) 본문
업로드 결과가 JSON 객체로 반환되었다면 업로드 후에 업로드 부분을 초기화 시키는 작업과
결과 데이터를 이용해서 화면에 썸네일이나 파일 이미지를 보여줘야함.
업로드가 끝난 후 초기화 시켜주는 작업과 업로드된 결과를 화면에 반영해줘야함.
<input type='file'>은 다른 DOM 요소들과 조금 다르게 readonly라 안쪽 내용을 수정할 수 없기 때문에 별도의 방법으로 초기화를 시켜 또 다른 파일을 추가하도록 만들어야함.
$(document).ready(function(){


var cloneObj = $(".uploadDiv").clone();

$("#uploadBtn").on("click", function(e){

    .................

    }

    $.ajax({
        url: '/uploadAjaxAction',
        processData: false,
        contentType: false,
        data: formData,
        type: 'POST',
        dataType : 'json',
        success: function(result){
            console.log(result);

            $(".uploadDiv").html(cloneObj.html());
        }
    }); //$.ajax
});
});
첨부파일을 업로드하기 전에 아무 내용이 없는 <input type='file'> 객체가 포함된 div를 복사함.
첨부파일을 업로드 한 뒤에는 복사된 객체를 div내에 다시 추가해서 첨부파일 부분을 초기화함.
이러면 첨부파일을 추가하고 버튼을 클릭하면 첨부파일을 다시 추가할 수 있는 형태로 변경됨.
업로드 결과는 JSON 형태로 받아왔기에 이를 이용해서 화면에 적절한 썸네일을 보여주거나 파일 아이콘을 보여줘야함.
ajax의 처리결과를 볼 수 있도록 수정.
<div class="uploadDiv">
	<input type='file' name='uploadFile' multiple>
</div>

<div class="uploadResult">
	<ul>

	</ul>
</div>

var uploadResult = $(".uploadResult ul");

function showUploadFile(uploadResultArr){

    var str = "";

    $(uploadResultArr).each(function(i, obj){
        str += "<li>" + obj.fileName + "</li>";
    });
    uploadResult.append(str);
}

$.ajax({
    url: '/uploadAjaxAction',
    processData: false,
    contentType: false,
    data: formData,
    type: 'POST',
    dataType : 'json',
    success: function(result){
        console.log(result);

        showUploadFile(result);

        $(".uploadDiv").html(cloneObj.html());
    }
}); //$.ajax
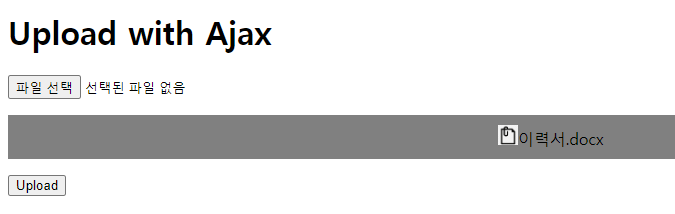
showUploadFile은 JSON 데이터를 받아서 해당 파일의 이름을 추가. ajax 결과에서 받은 JSON 데이터를 showUploadFile을 호출.
그리고 파일 선택 후 업로드를 하면 파일이 보이는걸 확인.

일단 일반파일이 업로드된 상황에서 첨부파일의 아이콘등을 보여주도록 수정.
기존 webapp 밑에 resources 폴더에 img 폴더를 생성.
일반 첨부파일의 이미지를 추가. 그리고 uploadAjax.jsp에서 이미지가 보이게 수정. 하면서 스타일을 적용해서 첨부파일 영역 처리.
<style type="text/css">
.uploadResult {
	width: 100%;
	background-color: gray;
}

.uploadResult ul {
	display: flex;
	flex-flow: row;
	justify-content: center;
	align-items: center;
}
.uploadResult ul li{
	list-style: none;
	padding: 10px;
}
.uploadResult ul li img{
	width: 20px;
}

</style>
</head>


var uploadResult = $(".uploadResult ul");

function showUploadFile(uploadResultArr){

    var str = "";

    $(uploadResultArr).each(
        function(i, obj){
            if(!obj.image){
                str += "<li><img src='/resources/img/attach.png'>"
                    + obj.fileName + "</li>";
            }else{
            str += "<li>" + obj.fileName + "</li>";
            }
    });
    uploadResult.append(str);
}
showUploadFile은 이미지 파일이 아닌 경우에 파일 아이콘을 보여주는 형태로 작성.
일판 파일을 첨부하면 attach.png 파일을 보여줌.
첨부파일 아이콘 처리를 했으니 이제 이미지 파일도 썸네일 작업을 해야함.
썸네일은 서버를 통해서 특정 URI를 호출하면 보여줄 수 있도록 처리.
해당 파일의 경로와 uuid가 붙은 파일의 이름이 필요하므로 조금 복잡함.
썸네일은 GET 방식을 통해서 가져올 수 있도록 처리. 특정한 URI뒤에 파일 이름을 추가하면 이미지 파일 데이터를 가져와서 img 태그를 작성하는 과정을 통함.
서버에 전송하는 데이터는 파일의 경로 + s_ + uuid가 붙은 파일 이름
이때 경로나 파일 이름에 한글 혹은 공백 등의 문자가 들어가면 문제가 발생할 수 있음.
이를 방지하기 위해 encodeURIComponet() 함수를 이용해서 URI에 문제가 없는 문자열을 생성해서 처리.
UploadController에서 특정한 파일 이름을 받아서 이미지 데이터를 전송하는 코드를 우선 생성.
@GetMapping("/display")
@ResponseBody
public ResponseEntity<byte[]> getFile(String fileName){

    // 요청된 파일 이름 로깅
    log.info("파일 이름 : " + fileName);

    // 요청된 파일 경로 생성
    File file = new File("c:\\upload\\" + fileName);


    // 요청된 파일 이름 로깅
    log.info("파일 : " + file);

    // 응답 엔터티 초기화
    ResponseEntity<byte[]> result = null;

    try {
        // 파일의 Content-Type 추출하여 헤더 설정
        HttpHeaders header = new HttpHeaders();

        // 파일의 바이트 배열을 복사하여 응답 엔터티 생성
        header.add("Content-Type", Files.probeContentType(file.toPath()));
        result = new ResponseEntity<>(FileCopyUtils.copyToByteArray(file),
                header, HttpStatus.OK);
    } catch (IOException e) {
        e.printStackTrace();
    }
    return result;
}
호출은 /display?fileName=/년/월/일/파일이름 형태로 호출.

그럼 JavaScript를 사용해서 브라우저에서 GET 방식으로 첨부파일 이름을 사용할 때에는 항상 파일 이름에 포함된 공백 문자나 한글 이름 등의 문제가 될 수 있음.
이를 수정하기 위해서는 encodeURIComponent()를 이용해서 URI 호출에 적합한 문자열로 인코딩 처리해야함.
function showUploadFile(uploadResultArr){

    var str = "";

    $(uploadResultArr).each(function(i, obj){

            if(!obj.image){
                str += "<li><img src='/resources/img/attach.png'>"
                    + obj.fileName + "</li>";
            }else{

                var fileCallPath = encodeURIComponent( obj.uploadPath + "/s_"
                        + obj.uuid + "_" + obj.fileName);

                str += "<li><img src = '/display?filename="+fileCallPath+"'></li>";
            }
    });
    uploadResult.append(str);
}
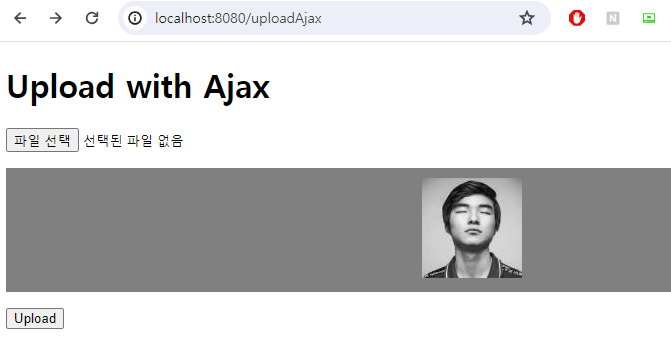
브라우저에서는 이미지 종류 파일을 업로드한 경우에는 썸네일 이미지가, 일반 파일의 경우에는 파일 아이콘이 보이게 됨.
PS) 하다가 오류랑 오타가 많아서 수정하는데 오래걸림....
'spring > 프로젝트' 카테고리의 다른 글
| 29. 파일 다운로드( 다운로드 UUID 지우기, 이미지 원본 javascript 처리 ) (0) | 2024.02.21 |
|---|---|
| 28. 파일 다운로드(브라우저 처리) (0) | 2024.02.19 |
| 27-1. 파일 업로드(썸네일 이미지) (0) | 2024.02.17 |
| 26. ajax 파일 업로드 (파일 확장자, 크기 처리, 년/월/일 폴더 처리, UUID 중복 파일 처리) (0) | 2024.02.15 |
| 25. ajax 파일 업로드 (0) | 2024.02.14 |


