
Notice
Recent Posts
Recent Comments
Link
| 일 | 월 | 화 | 수 | 목 | 금 | 토 |
|---|---|---|---|---|---|---|
| 1 | 2 | 3 | ||||
| 4 | 5 | 6 | 7 | 8 | 9 | 10 |
| 11 | 12 | 13 | 14 | 15 | 16 | 17 |
| 18 | 19 | 20 | 21 | 22 | 23 | 24 |
| 25 | 26 | 27 | 28 | 29 | 30 | 31 |
Tags
- Connection pool
- update
- 환경설정
- MVC CRUD
- MVC 게시판
- hikaricp
- spring
- 게시판만들기
- Controller
- log4j
- 게시판
- jdbc
- log4jdbc
- Oracle 연결
- CRUD
- 게시판 List
- MVC
- mybatis
- service
- Oracle
- delete
- 서비스계층
- MVC설정
Archives
- Today
- Total
yahayaha
0. 게시판 만들기 환경 설정 본문
드디어 길고 긴 게시판 만들기.
먼저 스프링 레거스 프로젝트를 만듬.
그리고 pom.xml에서 스프링의 버전과 java 버전 그리고 lombok, junil, Hikari, mybatis, log4jdbc 등 라이브러리 추가.
	<properties>
		<java-version>1.6</java-version>
		<org.springframework-version>5.2.7.RELEASE</org.springframework-version>
		<org.aspectj-version>1.6.10</org.aspectj-version>
		<org.slf4j-version>1.6.6</org.slf4j-version>
	</properties>

   	 <groupId>org.apache.maven.plugins</groupId>
                <artifactId>maven-compiler-plugin</artifactId>
                <version>2.5.1</version>
                <configuration>
                    <source>1.8</source>
                    <target>1.8</target>
                    <compilerArgument>-Xlint:all</compilerArgument>
                    <showWarnings>true</showWarnings>
                    <showDeprecation>true</showDeprecation>
	</configuration>


    		<dependency>
			<groupId>org.springframework</groupId>
			<artifactId>spring-jdbc</artifactId>
			<version>${org.springframework-version}</version>
		</dependency>

		<dependency>
			<groupId>org.springframework</groupId>
			<artifactId>spring-tx</artifactId>
			<version>${org.springframework-version}</version>
		</dependency>

		<dependency>
			<groupId>org.springframework</groupId>
			<artifactId>spring-test</artifactId>
			<version>${org.springframework-version}</version>
		</dependency>

       		 <dependency>
			<groupId>junit</groupId>
			<artifactId>junit</artifactId>
			<version>4.12</version>
			<scope>test</scope>
		</dependency>


      		  <dependency>
			<groupId>javax.servlet</groupId>
			<artifactId>javax.servlet-api</artifactId>
			<version>4.0.1</version>
			<scope>provided</scope>
		</dependency>

      		 <!-- Hikari CP -->

		<dependency>
  		  <groupId>com.zaxxer</groupId>
  		  <artifactId>HikariCP</artifactId>
   		<version>2.7.4</version>
		</dependency>

		<!-- Hikari CP -->

		<!-- MyBatis -->

		<dependency>
  		  <groupId>org.mybatis</groupId>
  		  <artifactId>mybatis</artifactId>
   		<version>3.5.2</version>
		</dependency>

		<dependency>
  		  <groupId>org.mybatis</groupId>
  		  <artifactId>mybatis-spring</artifactId>
   		<version>1.3.2</version>
		</dependency>

		<!-- MyBatis -->

		<!-- log4jdbc 관련 -->

		<dependency>
  		  <groupId>org.bgee.log4jdbc-log4j2</groupId>
  		  <artifactId>log4jdbc-log4j2-jdbc4</artifactId>
   		<version>1.16</version>
		</dependency>

		<dependency>
 		   <groupId>org.apache.logging.log4j</groupId>
 		   <artifactId>log4j-api</artifactId>
  		  <version>2.0.1</version>
		</dependency>

		<dependency>
  		  <groupId>org.apache.logging.log4j</groupId>
  		  <artifactId>log4j-core</artifactId>
   		 <version>2.0.1</version>
		</dependency>

		<!-- log4jdbc 관련 -->

        <!-- https://mvnrepository.com/artifact/com.oracle.database.jdbc/ojdbc11 -->
		<dependency>
   		 	<groupId>com.oracle.database.jdbc</groupId>
   		 	<artifactId>ojdbc11</artifactId>
    	 	<version>23.2.0.0</version>
		</dependency>
추가하고 수정하거 진짜 많다 그죠
근대 더 해야함.
데이터베이스 커넥션 셋팅 해야하니까 root-context로 가서 코드를 추가.
	<!-- DataSource -->

	<bean id="hikariConfig" class="com.zaxxer.hikari.HikariConfig">
	<property name="driverClassName"
		value="net.sf.log4jdbc.sql.jdbcapi.DriverSpy"></property>
	<property name="jdbcUrl"
		value="jdbc:log4jdbc:oracle:thin:@localhost:1521:XE"></property>


	<property name="username" value="book"></property>
	<property name="password" value="1234"></property>

	</bean>

	<!-- HikariCP configuration -->
	<bean id="dataSource" class="com.zaxxer.hikari.HikariDataSource" destroy-method="close">
		<constructor-arg ref="hikariConfig"></constructor-arg>
	</bean>

	<!-- HikariCP configuration -->
근대 여기서 주의 해야하는점.
<property name="driverClassName" value="net.sf.log4jdbc.sql.jdbcapi.DriverSpy"></property>이게 log4jdbc 라이브러리인데 이걸 사용하려면 파일이 필요함.

저건 저번 포스팅때 써놨음.
https://yayayahaha.tistory.com/26
5-2. MyBatis 스프링 연동 (2)
5. XML 매퍼 활용하기 SQL이 복잡하거나 길어지는 경우에는 어노테이션 보다는 XML을 이용하는 방식을 더 선호하게 됨. 다행히 MyBatis-Spring의 경우 Mapper 인터페이스와 XML을 동시에 이용할 수 있음.
yayayahaha.tistory.com
그럼 이제 DB 연결이 잘 되었는지 간단하게 확인 해 볼겸 톰캣 실행해봅시다.
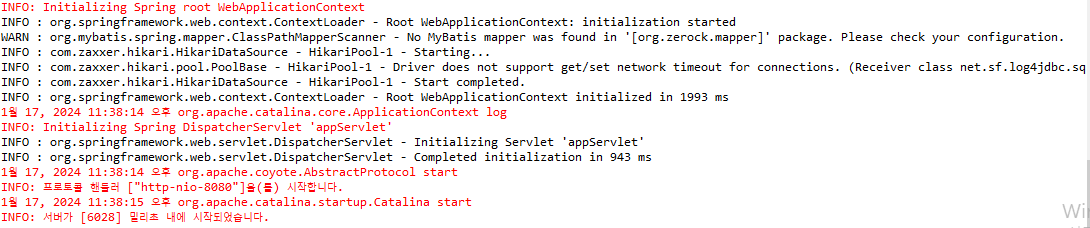
실행이 잘 됩니다.
그럼 이제 mapper 작업하고 테스트 코드도 한번 싹 돌려보죠.
먼저 root-context파일에 스캔을 추가합시다.
<mybatis-spring:scan base-package="org.zerock.mapper"/>
그리고 매퍼가 잘 되는지 인터페이스를 하나 만들어서 테스트 코드를 돌려보죠.

@Select("select sysdate from dual")
	String getTime();
import org.junit.Test;
import org.junit.runner.RunWith;
import org.springframework.beans.factory.annotation.Autowired;
import org.springframework.test.context.ContextConfiguration;
import org.springframework.test.context.junit4.SpringJUnit4ClassRunner;


import lombok.extern.log4j.Log4j;

@RunWith(SpringJUnit4ClassRunner.class)
@ContextConfiguration("file:src/main/webapp/WEB-INF/spring/root-context.xml")
@Log4j
public class TimeMapperTests {

	@Autowired
	private TimeMapper timeMapper;

	@Test
	public void testGetTime() {
		log.info("testTime.................");
		log.info(timeMapper.getTime());
	}
}
테스트를 실행해봅시다.
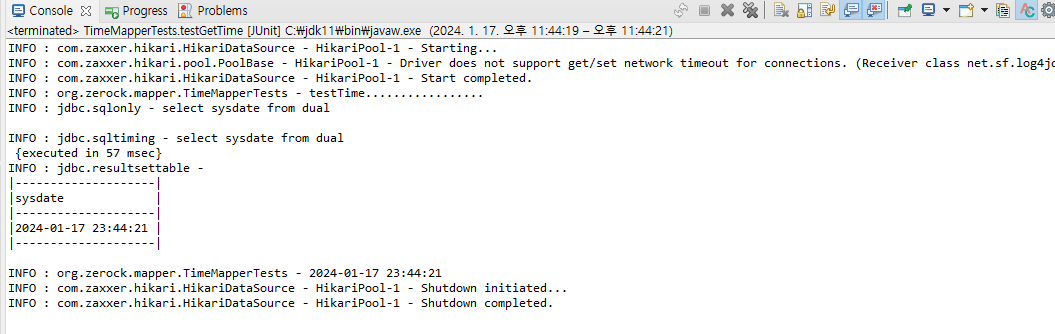
성공이네욘
'spring > 프로젝트' 카테고리의 다른 글
| 4. CRUD (read) (0) | 2024.01.20 |
|---|---|
| 3. CRUD (insert) (0) | 2024.01.20 |
| 2. 영속 계층 구현 준비하기 (0) | 2024.01.20 |
| 1. 오라클 테이블 생성 (0) | 2024.01.18 |
| 2-2 스프링 MVC Controller (0) | 2024.01.16 |
'spring/프로젝트' Related Articles
more


